A Freenove ESP32-S3 2.8" touch screen (FNK0104B, a "CYD" with an ESP32-S3) with an SD card: it lists the firmwares on its card and on mutant.cloud (with what each one is), downloads them over Wi-Fi, and installs them on the FM-1. Its USB-C port is a USB host, so a controller on a hub with the FM-1 plays it; Bluetooth MIDI keyboards, phones and computers join in. Nothing to put together.
You need
- the Freenove ESP32-S3 Display, 2.8", with touch (FNK0104B; the A has no touch)
- a USB-C OTG adapter with a charging port (USB-C plug; a USB-A socket and a USB-C charging socket) that passes charging and data at the same time. Look for one sold for the Chromecast with Google TV: it's the same situation, a device that is the USB host while it's powered through that port. Many 3-port "splitters" can't: they say "does not support charging and data at the same time".
Or a hub with a power input made for the Chromecast or Fire TV (USB-C plug, USB-A ports, a charging port): the adapter and the hub in one. - a small USB hub (the adapter powers it)
- a USB-C charger or a power bank
- a microSD card (FAT32)
- Optional: a flat 3.7 V LiPo for the battery case, up to 68 × 52 × 11 mm: a 3000 mAh cell like MakerFocus's 4-pack (65 × 36 × 10 mm, 1.25 mm plug). Any plug is fine: the board comes with a cable for its
BATsocket, with bare wires - Chrome or Edge on a computer, and a USB-C cable that carries data
Install
- Plug the board into the computer, straight in (not through the adapter). If it has an older fm1buddy on it, hold its BOOT button (on its back, next to the USB-C) while you plug it in.
-
Install: press the button, pick the board's port (USB JTAG/serial debug unit, or usbmodem), and confirm.
This browser can't: use Chrome or Edge on a computer (or download the .bin for esptool: esptool.py --chip esp32s3 write_flash 0x0 fm1buddy-cyd-s3.bin). The page must be opened over https.To update it later, plug it into the computer and install again: on a computer it's a serial port, no BOOT button needed.
- The SD card (FAT32): put it in. Firmwares go into its
fm1folder: the board downloads them there itself, or copy.fwscpackages there on a computer. - Wi-Fi: on the board, tap the gear, then Wi-Fi, pick your network and type its password. Wi-Fi is only on while it downloads.
-
Plug in: the adapter into the board, a hub into the adapter's USB-A, a charger or power bank into its charging port, and the FM-1 and your controller into the hub.
controller ─┐
            ├─ USB hub ── OTG adapter ── CYD-S3
FM-1 ───────┘                 │
                  charger ────┘ (its charging port)
Use it
- Firmware (the download icon): SD card lists the firmwares on the card, Hub the Firmware Hub's (filter them by kind, sort them by date or name). Tap one for what it is; Save to SD downloads it, Install (tap it twice) installs it on the FM-1; with no backup of the FM-1 on the SD card yet, it says so first, with a button to make one. Keep the FM-1 plugged in until it says Installed. Each download is checked (its size, sha256 and identity) before it's kept.
- SLOOP (in Sounds, the folder icon, with an FM-1 running SLOOP 2.3 or later): Back it up saves everything on it in SLOOP's own file, in
sloopon the SD card (its web editor opens them, and its backups go there too). Tap a backup to restore all of it (the FM-1 is backed up first) or load one of its projects. Load .wav files puts a folder of them fromsloop/samplesinto one of its sample slots, each file a key zone named by its root note (bass_C2.wav). For other firmware, Sounds says what it can do, and what to install for more. - MIDI (the note icon): what's on the hub, each with a light when it plays. Whatever one plays, the others hear, unless
midimap.txton the SD card says otherwise: rules likefrom nanokey -> to fm-1 ch 2orfrom launchkey cc 1 -> to fm-1 cc 74(the file explains how, and the MIDI page says if a line doesn't read). Mapping lists them in plain words, deletes them, and adds new ones by touch: a device onto its own channel, a keyboard split at any key, transposed, at a fixed or scaled velocity. Clock, arp sends MIDI clock at a tempo (tap it, start and stop) or follows a device's, and has an arpeggiator and chord memory for the controllers' notes. Touch controller makes the screen a controller of its own, Touch: an X/Y pad (each of two fingers sends two CCs, and can play notes along a scale) or 16 pads, as hard as you hit them (harder at a pad's top). Rules likefrom touch -> to fm-1 ch 2work on it; its gear picks the CCs, the channel, the scale and the notes. Bluetooth MIDI is off until you turn it on there: phones, tablets and computers connect to fm1buddy, and Bluetooth MIDI keyboards and synths around are listed: tap one to connect it (it's remembered). - Sounds (the folder icon): Record audio records the FM-1's own sound over USB to WAV files in
recordingson the SD card, with a meter for each side and a warning when it clips (turn the FM-1 down then: its USB level follows MASTER). It needs firmware that sends USB audio: Felucca, and those built on it like SLOOP. A class-compliant USB microphone or sound card works too. - Settings (the gear): Wi-Fi, the color theme, what it starts on (firmware, MIDI, the mapping or the touch controller), the brightness. On a computer: plugged straight into a computer, the board is its serial port (for flashing), or with USB MIDI a MIDI device, fm1buddy, in any music app: the touch controller, the clock and Bluetooth MIDI devices play it, and it plays them. To flash it then, hold BOOT as you plug it in. Back up the FM-1 saves all of its flash to the SD card. Recover the FM-1 is for one that doesn't start any more: pick a firmware or a backup, switch the FM-1 off, plug it straight into the adapter instead of the hub (keep the charger in), tap Start, and switch the FM-1 on. fm1buddy wakes the boot loader in its chip (no firmware can break it), saves its flash as it was, and writes the firmware back.
A case
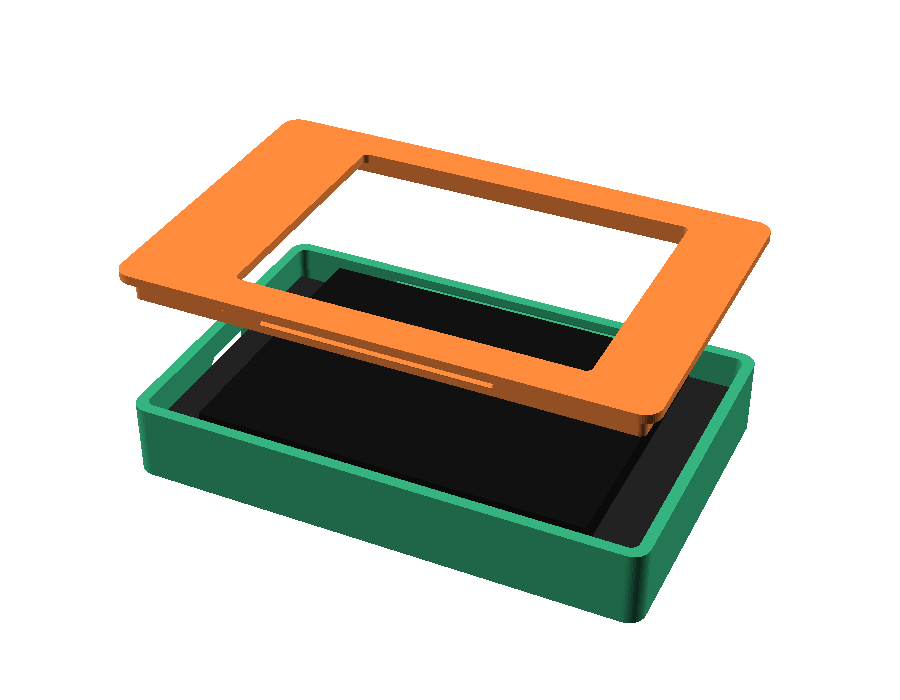
Print the base open side up and the lid flat side down, without supports (PLA or PETG). The lid snaps on and holds the board down. The SD card goes in at the side.
With a battery, it goes under the board, on its BAT socket (MX1.25, 2 pins). Pick yours, or type its size (the cell's own, from its listing: room is added), and the base is made for it, here in your browser. Red must go to + on the board: some batteries come wired the other way, so check before plugging it in. It stays connected, so it charges whenever the charger is in, and the board can sleep by itself when nothing is going on: pick how soon in Settings > Sleep (it's off at first), and touch the screen to wake it.
What it can't do
- Up to 4 USB MIDI devices on the hub: the FM-1 and 3 controllers, say.
- The hub needs the charger. The board can't power its USB-C port itself, so the hub and what's on it get their power from the adapter's charging port. A battery keeps the screen and Bluetooth MIDI going without it, not the hub.
- Bluetooth stops while Wi-Fi is on (they don't both fit in its memory), and starts again after.
Good to know
- The FM-1 only takes firmware over USB, so installing goes through the board's USB host (or a computer).
- Installing firmware is at your own risk. If the FM-1 won't start, hold OCT- while switching it on (the USB rescue), and install again.
- If a controller sends back everything it receives ("MIDI thru" or "echo" in its settings), turn that off, or messages go round in circles.
Make a midimap.txt for the SD card: the rules for what each device's notes and controls do (see MIDI in Install). Plug your controllers into this computer to see their names and learn their controls; download the file, put it on the card's top folder, and press reload on the board's MIDI page.
Devices
A rule names a device by part of its name (any case), as the board's MIDI page shows it. Each one's short name is filled in: change it if it would also match another device.
Rules
The first rule that matches a message decides; a message no rule matches goes to all the other devices. Leave out what should stay as it came in. Learn fills a rule's left side from the next control you move.
midimap.txt